How to connect and use Analog Joystick with an Arduino
- Brainy-Bits
- Oct 3, 2020
- 1 min read

OVERVIEW
Analog joysticks are a great way to add some control in your projects.
In this tutorial we will learn how to use an analog joystick module.
PARTS USED
Arduino UNO
Joystick Module
Dupont Wires
These are Amazon affiliate links...
They don't cost you anything and it helps me keep the lights on
if you buy something on Amazon. Thank you!
CONNECTIONS

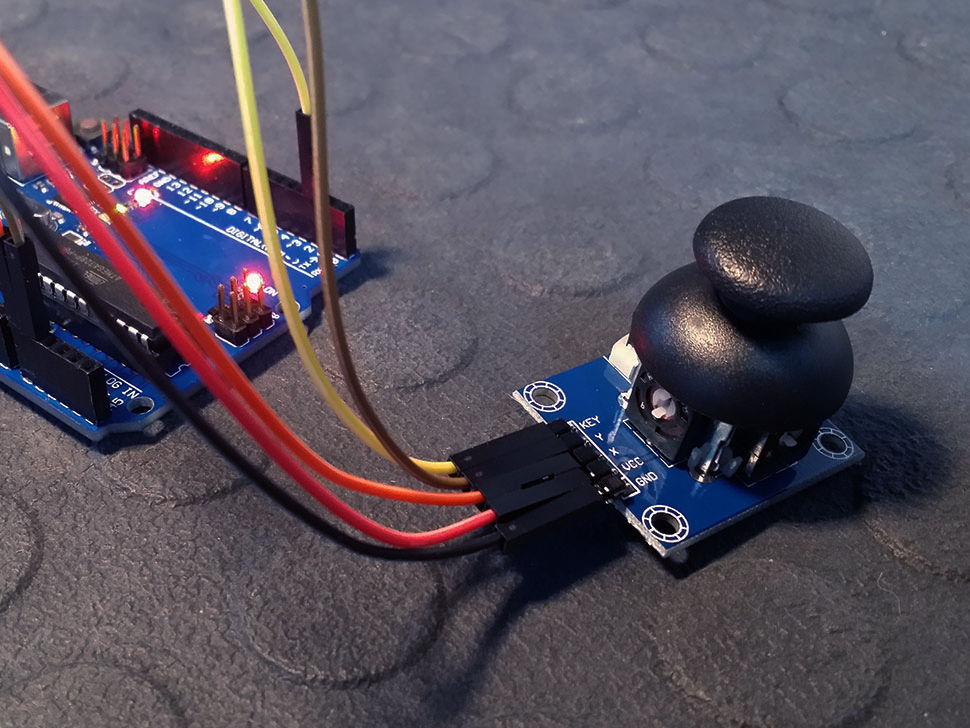
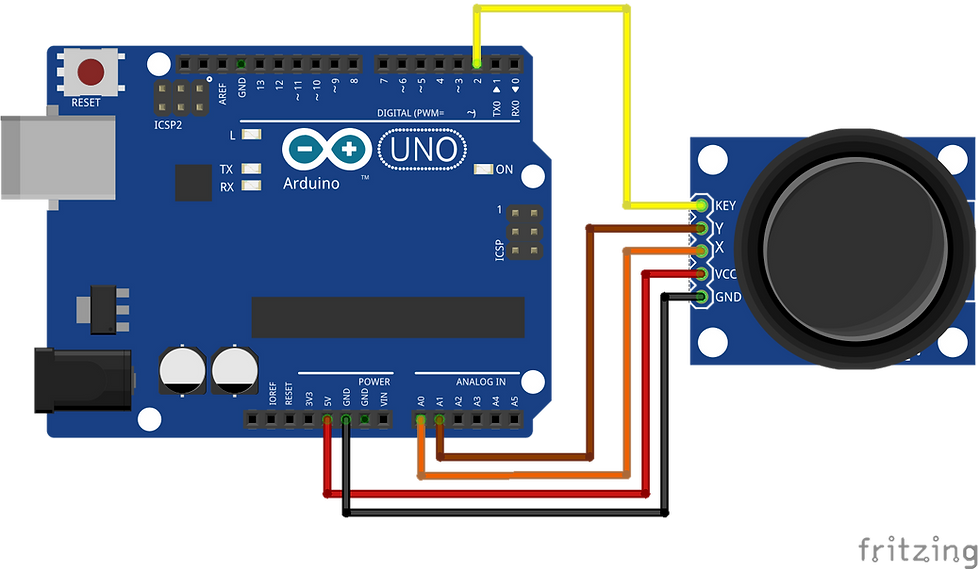
We need 5 connections to the joystick.
The connection are : Key, Y, X, Voltage and Ground.
“Y and X” are Analog and “Key” is Digital.
If you don’t need the switch then you can use only 4 pins.
THE CODE
Analog joysticks are basically potentiometers so they return analog values.
When the joystick is in the resting position or middle, it should return a value of about 512.
The range of values go from 0 to 1024.
// Arduino pin numbers
const int SW_pin = 2; // digital pin connected to switch output
const int X_pin = 0; // analog pin connected to X output
const int Y_pin = 1; // analog pin connected to Y output

void setup() {
  pinMode(SW_pin, INPUT);
  digitalWrite(SW_pin, HIGH);
  Serial.begin(115200);
}

void loop() {
  Serial.print("Switch:  ");
  Serial.print(digitalRead(SW_pin));
  Serial.print("\n");
  Serial.print("X-axis: ");
  Serial.print(analogRead(X_pin));
  Serial.print("\n");
  Serial.print("Y-axis: ");
  Serial.println(analogRead(Y_pin));
  Serial.print("\n\n");
  delay(500);
}
TUTORIAL VIDEO
DOWNLOAD
Copy and Paste the above Sketch/Code in your Arduino IDE.

Comentarios